The time honored tradition of aluminum can crochet is almost as much fun as emptying the cans in the first place. Whether in a drunken stupor or sugar-induced hallucinatory state, nothing inspires fashion more than downing a six-pack of just about anything! If you can crush it against your forehead, you can make an outfit out of it.
The Golden Rule of aluminum can crochet is this: Perfection is not allowed.
Doesn’t that make everyone feel better? This craft simply does not lend itself to precise measurement, symmetrical shapes, or exact patterns. By the time you’ve cut the cans, trimmed them, and punched all the holes, you’ll notice that they’re all a little different. A wonky corner here, a few extra holes there, an entire finger sliced off and rolling away over there. Because of this, the patterns given are more like guidelines. We’ll show you how to prepare the cans and tell you how we ended up with what we made. The forgiving nature of crochet will allow you to experiment and make adjustments as you go.
From suds to duds, let’s find out how the magic happens.
What you’ll need:

– Clean cans (did you know that mold loves old beer and soda? Yech.)
– Strong scissors (we went through just about every pair in the house and different people preferred different scissors or snips. Go figure.)
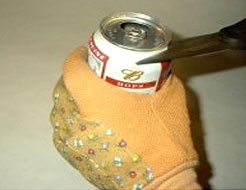
– Protective gloves
– Hole punch
– Acrylic yarn (or you can use up that leftover cashmere. Whichever.)
– Crochet hook (sizes G/6 – H/8. These fit the holes made by the hole punch)
– Ruler
– Tapestry hook
– Band-aids (seriously, be CAREFUL!)
Trim the cans over a garbage can or some newspaper. You’ll be creating tiny, razor sharp shards of metal and they tend to fly at you cut. As soon as you step on one and it gets stuck in your sock, you’ll see what I mean.
Cutting the can:
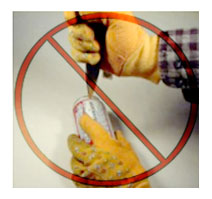
NO!
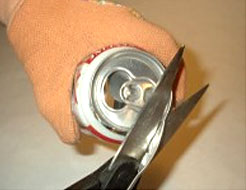
You can either poke the scissors into the top of the can and start cutting around as in #1 and #2:
1.  2. 2. 
Or trim the very edges as in #3 and #4 (this doesn’t seem to work for all cans):
3.  4. 4. 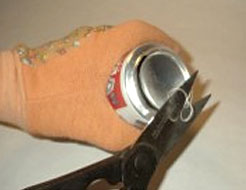
Then cut the can up the middle on both sides of the can to make two pieces (unless your pattern needs an extra large piece). Be sure not to cut through the image you want to use. Try to leave as much room between the designs on either sign of the can as you can.
5. 
Most cans will have a little bit of an angle at both ends. Once you cut the can in half, trim the angles off so the pieces can lay flat. Trim the remaining pieces to the measurements required by the pattern. (If you want to flatten the pieces for easier trimming, we found that bending them around a broom handle really helped.)
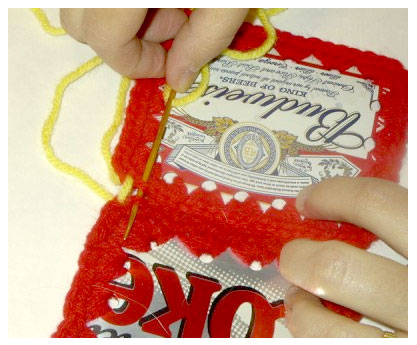
Once trimmed, punch a hole about every ½” or so, about ¼” or ½” from the edge. Try to have the same amount on each side, but don’t go nuts. In the end, you’ll barely notice.
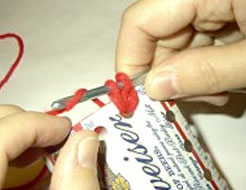
Now it’s time to crochet into the holes around the can so it’s not a deadly weapon, but a beautiful addition to any wardrobe. Now, these instructions are by no means the only way to do this. I use a Single Crochet, but go ahead and experiment. A Double Crochet might work better for you, depending on how far from the edge the holes end up. Or just make up a new stitch. Seriously.
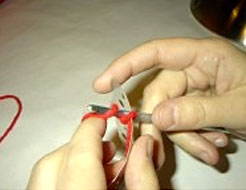
Tie the yarn loosely to the starting hole. The first stitch is a little weird. Insert the crochet hook into the hole, loop the yarn over the hook, pull through, loop the yarn over again and pull through the first loop. This isn’t an Official Single Crochet.
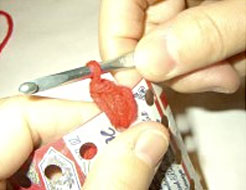
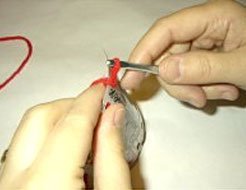
Now start with the Single Crochets (or whatever). Insert hook into the same hole, loop yarn over hook, pull through hole (there are now two loops on the hook), loop yarn over once more and pull through both loops.
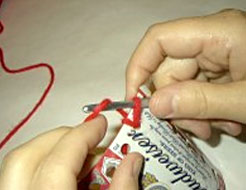
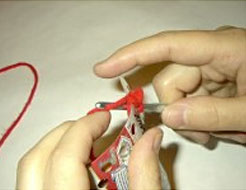
If you’re using a smaller hook, you’ll probably have to do about 4 stitches in each hole, 3 with the larger hook. Again, this is not a rule and it depends how far apart the holes are. You just want to make sure that the sides of the can are completely covered. Make 2 or 3 extra stitches in the corner holes to get full coverage. When you’ve gone all the way around, tie off and weave in ends.
Seaming the cans together is another place to experiment. Some patterns call for the cans to be seamed together right away, others need additional rows of crochet around them before seaming. Here’s what I do:
It’s just a simple back-and-forth between the back loops of the crochet stitches.
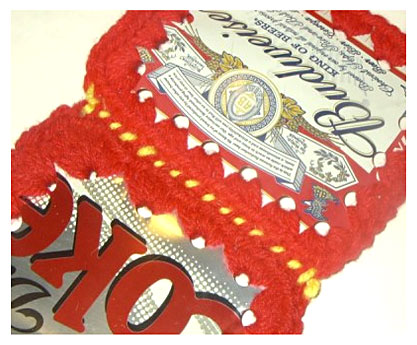
Try to seam cans together loosely so that if they aren’t the same height (as you see above), you have a little slack to play with to get them to fit together. If you add another row of cans, you might end up with a small hole between four cans. Do your best to stitch it, or just cover it with a pretty button or something.
Also, here is a little Quicktime movie I made of the process! (note, file is 15megs and will take a while to load)
Remember, if you can do it with a granny square, you can do it with an aluminum can!
|

 7.
7. 
 9.
9. 
 11.
11.